Making Ink from Berries (Pokeberry, Huckleberry, etc.)
By Dana Driscoll of The Druids Garden
While wild berries are amazing for eating and preserving, they are also fantastic for making inks and dyes. This post will describe the process through which you can make a long-lasting and vibrant berry ink. Your berry ink, which will dry in various shades of red, pink, blue, and purple, is excellent for drawing, writing, or even doing ink washes. Having an ink you’ve made yourself allows you to be creative while making use of sustainable materials that are locally harvestable!

Which Berries to Use?
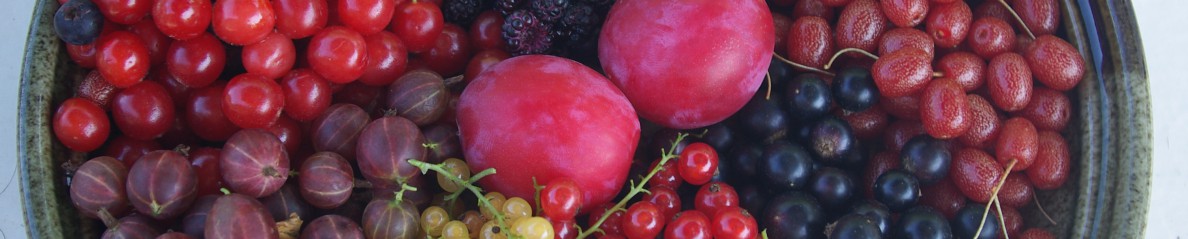
You can use any berry that has a nice dark stain when you cut it open. Here are the berries I’ve personally made ink from and the colors that they produce:
- Huckleberry (Garden, Wild) – Produces a nice blue/purple ink
- Pokeberry – Produces a hot pink/red ink (please don’t eat these berries, they are poisonous)
- Black Raspberry – Produces a light purple ink (after 1-2 years, it will darken to a brown)
- Red Raspberry – Produces a medium pink ink (after 1-2 years, it will darken to a light brown)
- Blackberry – Produces a purple ink
- Black Cherry – Produces a purple ink
- Red Cherry – Produces a light pink ink
- Elderberry – Produces a purplish-blue ink
Many other berries also demonstrate promise for ink making–so experiment and have fun!
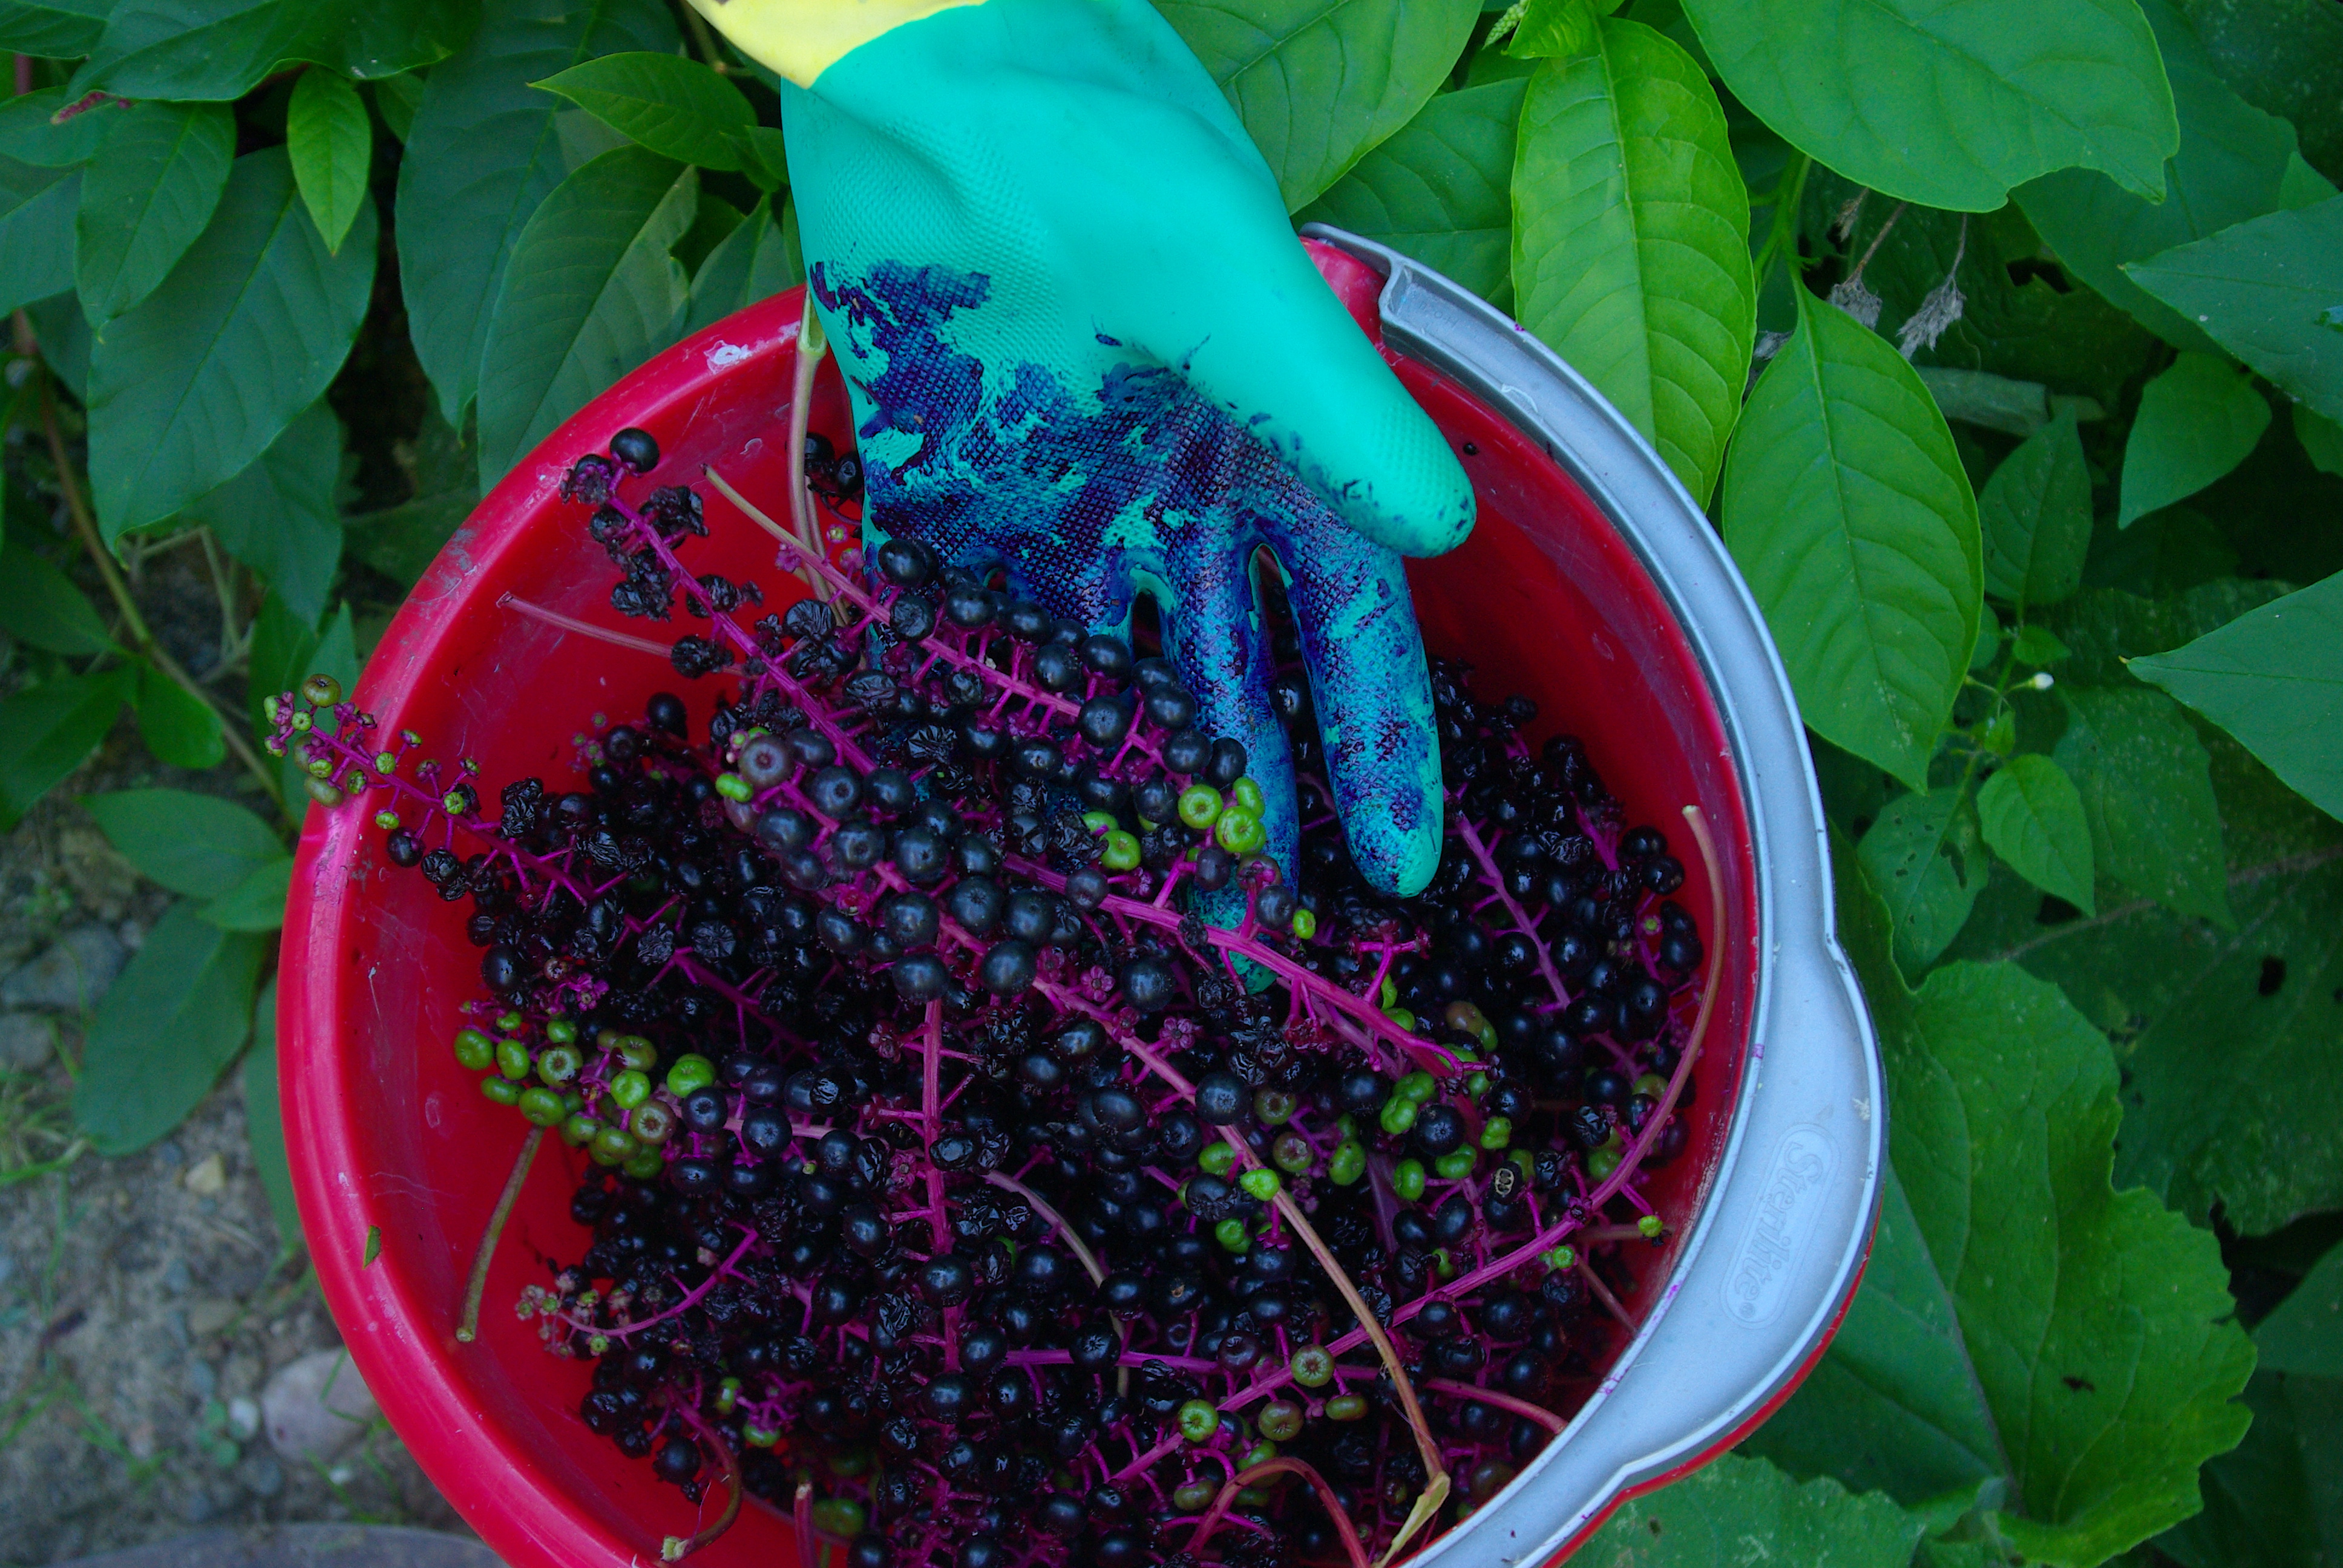
Harvesting Berries
Berries should be ripe (never under-ripe) or slightly over-ripe, but not rotten. When they are best for eating (for those that can be eaten) that’s the best time for ink making. You don’t have to worry about stems or small leaves; they will be removed during the ink-making process.
Ink Making Supplies
For ink making, you will need:
- a pot to cook your ink in (stainless steel or enamel)
- a potato masher (which you will use to mash down your berries; you could use a large fork in a pinch)
- 1-2 bowls (glass or stainless steel; buy them used at a thrift store).
- You’ll need an assortment of strainers and cheese cloth or tulle netting to remove any larger organic bits from your ink; depending on how refined you want your ink, you may also find it useful to have some muslin.
- Natural inks need a preservative, for this, you can use vinegar (I have apple cider shown, but I actually prefer white vinegar)
- Rubber gloves – unless you really want to get your hands stained with berry juice!
This last ingredient you don’t need, but I highly recommend it.
- Gum Arabic: Gum Arabic improves the viscosity of your ink, meaning it will flow nicely and have a bit more body. If you want to use a dip pen for writing or sketching, you really want the ink to flow nicely. But if you are experimenting with various inks and ingredients to see what works, I wouldn’t bother with the gum arabic.

I should say some more about gum arabic – you may find it also listed as acacia gum. You can get it in several forms: for painting in a refined liquid form, in a powder form, or in a resin form. I don’t recommend the resin form; its hard to get all the lumps out even if you grind it with a mortar and pestle. I’ve had the best luck with the liquid gum arabic used for watercolor painting. If you get the powdered form, add some water to it and let it sit overnight–you should end up with a thinnish gel once it is all dissolved. I have not had much success adding the powder right to the ink.
The Ink-Making Process
I’m going to be using a berry called a “Garden Huckleberry” as a demo for the photos (if you want some, you can find seeds for them here). But the process is identical regardless of what berry you choose to use.
Step 1: Start by putting your berries in a pot, turning your burner up to medium, and mashing down your berries. Depending on the berry, you may find that you need to add liquid at this stage–if so add vinegar. Never add water: it dilutes your ink and you need the vinegar as a preservative anyways. For 2 cups of huckleberries berries, you’ll end up adding a little under 1/2 cup of vinegar to get a good amount of ink. And yes, this will make your house smell like vinegar!

Step 2: Continue to mash and cook down your berries. You are looking for some liquid in your mash–if you don’t have much, add more vinegar. You want enough so that it will strain easily, but not so much that you dilute the ink.
Step 3: Simmer your berries for 10-15 minutes, mashing and stirring to prevent burning.
Step 4: Remove your berries from the stove and let them cool.
 Step 5: Once your berries are cool, begin straining them into one of your bowls. The principle of straining is simple–at this stage, you want to get all the non-liquid plant matter out of your ink. You will start with a strainer that has a thicker weave (bigger holes) and then work your way down. Alternatively, you can use a cheese cloth or piece of tulle netting that you’ve folded several times. For most of my inks, I send them through several strainers, working my way down to smaller strainers as the particles get smaller, till the ink flows smoothly. You may find the need to force the ink through the strainer during the 1st and second pass, but don’t force it through after that or you’ll end up with some stuff that shouldn’t be in there. After straining once, rinse out your strainer, and then strain a second time into your clean bowl. Repeat this process with more fine straining materials until you have a nice ink that doesn’t have any bits or particles in it.
Step 6: If you are using Gum Arabic, this is where you add it. I generally add about 1 1/2-2 tablespoons for each 1 cup of ink. Stir it in well.

Step 7: Bottle up your ink! Some inks aren’t very lightfast (meaning they fade in sunlight), so keep that in mind when you are considering storage options. You can keep your ink in the fridge if you like (sometimes they do grow mold if you don’t have enough vinegar in there…) but I usually don’t. The inks just hang out in my art studio so I have easy access to them when I want them!And please make sure you use good rubber gloves. I couldn’t find mine when making the ink, and the cheap plastic ones I used didn’t work so well…luckily the berry ink doesn’t last that long (unlike Walnut, which you won’t get out for weeks….)
Using your ink
Berry inks are going to be a little more watery and lighter than a traditional synthetic/processed ink. To counter this, you can add a lot of ink as you are working; alternatively, you can add a 2nd layer of ink if you are working on a surface that can take repeated application. Second, berry inks will oxidize as you use them–Huckleberry ink starts out a beautiful reddish-purple, but after several minutes, will dry to a lovely navy blue. So experiment with your ink and application before using it. Third, inks have varying degrees of lightfastness. Keep this in mind when you are creating!
You can use your ink in a number of different ways. My favorite way to use it is with a calligraphy pen (dip pen) on smooth Bristol board or vellum. Its a wonderful writing and drawing ink.
You can also use it for washes (just like you’d use a watercolor paint). When you use it in a wash, you may find that different variations of color are present as it dries–so experiment and have fun!
I’ve also experimented with putting it in stamp pads (although stamps prefer a more concentrated ink, so cook it down more). I’ve used it in mixed media art projects as well. The options are really, really broad with the ink, so be creative and have fun!


These are lovely. What a great thing to be able to do!